
Today’s post is inspired by the video blog HOME SKILLET found on youtube. I like the kids, they are spunky and independent. Go spike their stats. https://youtu.be/S_W2JlOAltQ is their first post, and https://youtu.be/pR2WkbfNb2g is the vlog that inspired this post. This is about Top Bar Bee hives to share with anyone who shows interest in this form of beekeeping. I like this style better than Langstroth hives because I don’t do lifting and don’t want to buy fancy equipment for honey harvesting. I am also intrigued by an approach focused on keeping bees that need less or no expensive treatments for Varroa mites or small hive beetles.
I have measurements for the top bar hives used by a guy down in Houston (Dean Cook- I hope I got his name correct!) who teaches on Top Bar hives at our local Bee Schools.
Its in my notes from the last Bee School I attended. So I will go look for that notebook and get those for this post. If you can do a deck, you can build these hives. Then set them out with some lemongrass essential oil in them and see if you cannot acquire a wild swarm.
The best part of free bees is that if they are too aggressive, you just need a new queen, so let them build out the comb, and get the hive going, then you order a new queen, and three days before you go get her, you locate and kill the old queen. The new queen is introduced three days later when they are frantic to get a new queen, and you let her stay in her little box and remove the cork from the end of the queen box that has candy as a second plug.
Let the bees eat through the sugar to free her– this usually is successful. Shortly later her babies will begin to hatch and a bit longer and the “hot” hive will no longer be hot– and you will have another colony with only the cost of the new queen. Many feral groups are not hot at all.
AH! Found MY NOTES!!
Untreated lumber yellow pine works as well as anything else.
Paint for exterior NOT interior (the bees coat the interior with propolis so it will be very well sealed indeed!) can be any color.
MATERIALS
2–, 8′ 2 x 12 to make a 6 foot long hive cut
1– 1 x 12 for the bottom boards
wood glue and screws
corks for the entry holes
paint for the exterior of the hive
pavers or concrete blocks to set the hives on– if you want.
TOOLS
a saw and a drill….tape measure, and a level to get the hive level when you set it up for the bees.
DIRECTIONS
A) cut 2 foot off the 8 foot boards= 2– 6′ long sides and 2– 2′ ends.
B) cut the bottom edge of the long sides at an angle so that when the sides are at 60degrees you can put a bottom board on flush, do not cut the top edge at all.
C) set the long sides between the ends, and glue and screw them at a 6o degree angle.
D) cut the bottom board and screw it on
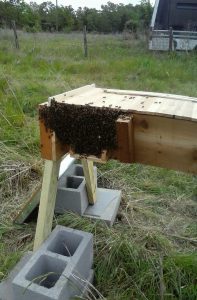
E) now, lots of videos show the holes cut close to the bottom board– go up a couple inches because there is a great metal device you can add later (and I will update with the link for that) that lets you close that up so that the queen cannot escape but the workers can go in and out.
If you drill the entry holes, usually three a couple inches apart, smaller, you can close them off with wine corks, or go larger and buy larger corks.
Usually leave only one hole open except during very busy honey making periods. Single door helps the guard bees to keep robber bees out.
All entries on the same side, I like mine to face east so that the morning sun hits the entries. I work the hive from the opposite side. Having the entry on the side away from you keeps you out of their flight path and you will annoy them less.
F) Now the top bars themselves are both the easiest and the most difficult. ANY scrap wood that is untreated (very important, all wood used for the body and bars must be untreated) can be used to make top bars.
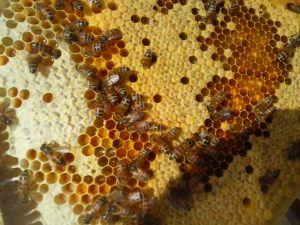
When a colony is new to its hive, you give them 1 1/4″ width bars to start (it is best width for brood). For Honey bars 1 1/2″ best.
You can put strips of foundation on the bars to help guide the comb building to keep it straight.
You will also need a bunch of thin pieces, about the thickness of paint sticks, so that when you get the bars in you can sneak those in to close up the last gap– the home is done.
G)Any sort of roof/lid over will keep it dry–the bees don’t care, Insulation makes the hive cooler in summer and warmer in winter which is good for the bees.
If you make the lid flat and with the long sides open so that sunlight can get under, it will discourage roaches from taking up residence and pooping on the bars.
My lid is not hinged, I just lift it off, this makes prying bars loose so I can inspect easier.
H) Legs are best spread so that the hive is squat and stable, or you can build a frame on legs (some use old pipe and set the legs in concrete, and tie the hives down on it).
Whatever you do, you will need to secure the hive for during high winds, and strap the lid down too.
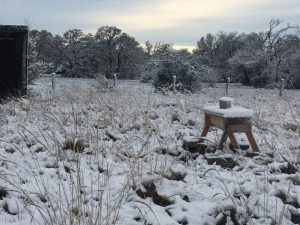
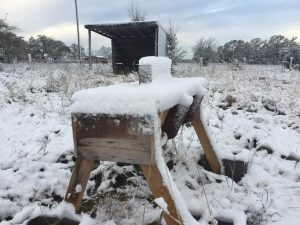
Mine have wood legs, sit on pavers and are braced with concrete blocks. Other blocks sit on top. We’s had some gusty winds and so far no movement.
I also set my top bar hives so a narrow end is facing into the prevailing winds.
If you can, plant sunflowers to give afternoon shade.
I) OH and VERY important— to help the bees make straight comb, LEVEL the hive both directions.
J) Some people like to get fancy and cut an observation window and put plexiglass over it and hinge a door on the outside of it, bees get annoyed if you look too often.If you price top bar hive kits then look at these directions, you will see that you can make your own and have several for much less money than one kit or one fully constructed hive AND yours will be larger.
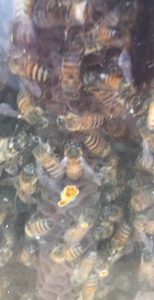
our first hive, first bees, and I honestly do not know what I am doing!
BOOKS:
THE BAREFOOT BEEKEEPER by Philip Chandler. Has basic plans in it, similar to above, but this design has efficient use of materials.
FIRST LESSONS IN BEEKEEPING by Keith S. Delaplane is a general introduction. He is another very good instructor!
TOP BAR BEEKEEPING by Les Crowder and Heather Harrell. I simply love Les Crowder’s lectures.
More design ideas can be gleaned from the videos.
VIDEOS
Here is a nice installing a package of bees video: https://youtu.be/wZe_OtxOz18 He is using starter bars with a thin piece centered down the bars, foundation strips in this case, but once you get things going straight you can use bars without.
Mike Palmer is an excellent lecturer. Here is my favorite Mike Palmer lecture: https://youtu.be/nznzpiWEI8A
Les Crowder is another good speaker. https://youtu.be/S1WeGzEan2o and https://youtu.be/AR6fxVR0SSg and…well, they apparently haven’t uploaded the first part yet. https://youtu.be/0gkz34d_L5w This one is a really GOOD instructional video for new beekeepers. He is just such a good teacher, go, enjoy!
Phil Chandler, another great person to learn from: https://youtu.be/yw1hPeYw-VY
Dean Cook is the instructor in the classes I have taken on Top Bar hives. I have to give him LOTS of credit for anything I do right because his classes have helped me lots, and the books he recommended have helped me, and my new hives are based on the descriptions of his design. I don’t think he has any videos. I’ll add one if I find one!
Be sure to join your local bee club. Twice when I panicked over if I was doing anything right, people from my club came and walked me though inspecting the hive. BeeKeepers are awesome people in my experience.
Lastly, for my region, I got my bees from Bee Weaver, so far my colony is thriving. I need to build some more hives so I can expand by splitting my current hive. https://youtu.be/A8F0iNBToWM
Dear Lord, Thank You for honey bees, top bar hives, beekeeping, honey, and the many people who generously teach and share what they know so that we can have more beekeepers. +Amen.
All the photos copyright 2018 by the author.